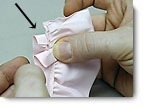
There are two general types of purchased quilt binding: ruffled bias quilt binding (usually sold by the yard) and prepackaged double fold quilt binding in 3 yard packages. As the name implies, quilt binding is used to finish the edge of a quilt or blanket. Both ruffled binding and packaged binding are perfect for throws, placemats, quilts, bibs, and more.
Applying Quilt Binding With A Ruffled Edge
1. Sandwich the edge of your fabric / quilt sandwich between the folded edges of the quilt binding, pinning the binding in place as you go. Leave an 1" extra quilt binding at the beginning and ending points. Remove the stitches from the binding about 1" from cut ends. 
2. Turn the edge of ruffle back 1/4" creating a rolled hem, encasing raw edge. Stitch. 
3. Fold the bias tape header 1/2", wrong side to wrong side. Press. The ruffle should be slightly shorter than the bias tape header. 
4. Finish pinning the quilt binding in place at the edge of your material. Repeat for the second end of the binding. 
5. Sew the binding around your entire piece of material with your stitching line 1/4" down from the edge of the binding.
Applying Packaged Double Fold Bias Quilt Binding
One Step Method:
1. With the narrow side up, fold the quilt binding over the edge of your project and stitch as close to the edge of the quilt binding as possible. 
2. To bind around a corner, sew to edge of fabric, remove your project you’re your sewing machine, and clip all threads. DO NOT CUT THE QUILT BINDING. 
3. Fold the quilt binding around the corner and pin, making sure that the pleat in the quilt binding is neatly mitered at the corner of the fabric. 
4. Place your fabric under pressure foot at the mitered pleat and begin to sew, making sure to backtack at the corner. 
Two Step Method:
1. Unfold the quilt binding and, with right sides together, match the crease of the tape with the seam line. Make sure that the narrow side of the tape is closest to the seam line. Sew, tape side up, in the crease of the tape. 
3. Turn the quilt binding to the back, pin and stitch "in the ditch". 
3. To bind around a corner, apply the quilt binding as in the previous two steps, cutting the tape off at the corner. With a new piece of binding, apply as in the first step, leaving 3/4" of binding extending beyond the corner. Fold the extension to the back, then fold the bias tape to the back. Pin and stitch "in the ditch". 
(All instructions and photos are courtesy of Wrights Co.)
By Florence Dove Google
0 products
Sorry, there are no products in this collection.

